Walk-through: Dataset hosting on GIN
In this walkthrough, we will use DataLad Gooey to create a dataset, save it contents, and publish it to GIN (G-Node Infrastructure).
Prerequisites
In order to use GIN for hosting and sharing your datasets, you need to:
Register a GIN account;
add a personal access token to your GIN account (for creation of repositories with DataLad);
add an SSH key to your GIN account (for uploading annexed contents).
Follow the instructions on GIN to do so.
If you need to generate an SSH key pair and want to stay in the world of graphical interfaces, we recommend using PuTTYgen for this purpose. Your private key needs to be placed in the .ssh folder in your home directory for it to be picked up correctly.
Create a dataset
Let's assume that we are starting with an existing folder which already has some content, but is not yet a DataLad dataset. Let's open the DataLad Gooey and set a base directory to our folder, or its parent directory.
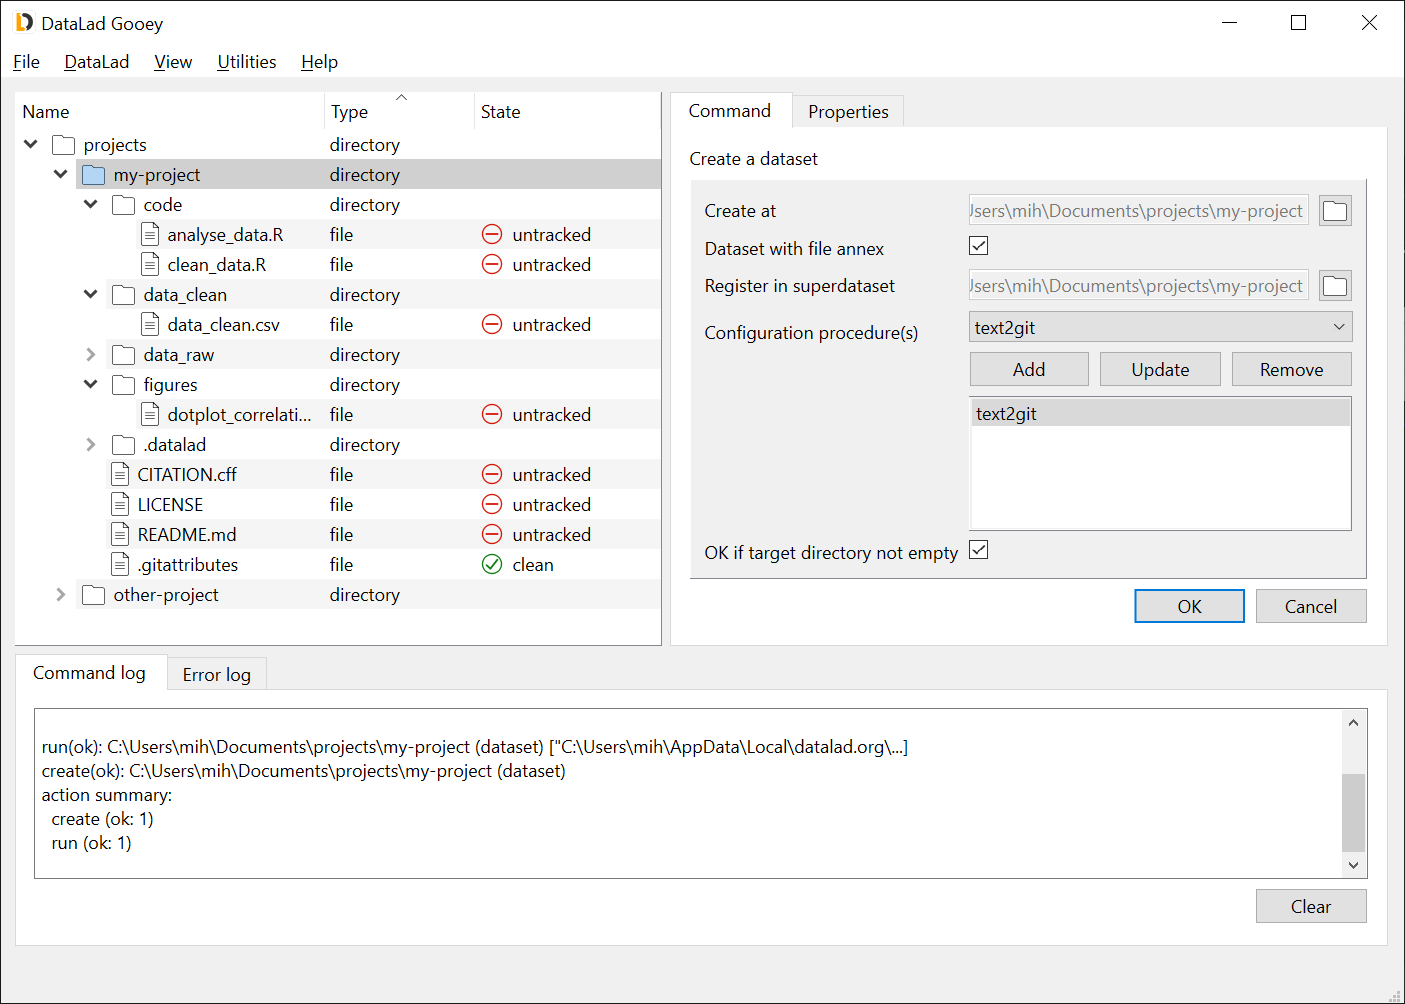
Our first operation is to to create a DataLad dataset. For this, right-click your folder and select Directory commands → Create a dataset. This will populate the Command tab on the right with options for the selected command. The first value (Create at) is already populated, since we used right-click to issue the command. We leave Dataset with file annex checked (default), and Register in superdataset not set (default). In this example we want to configure our dataset to annex binary, but not text files. To do so, select text2git from the list of Configuration procedure(s) and click Add. Finally, check the OK if target directory not empty to enforce dataset creation out of a non-empty folder. With the options selected, click OK.
Save the contents
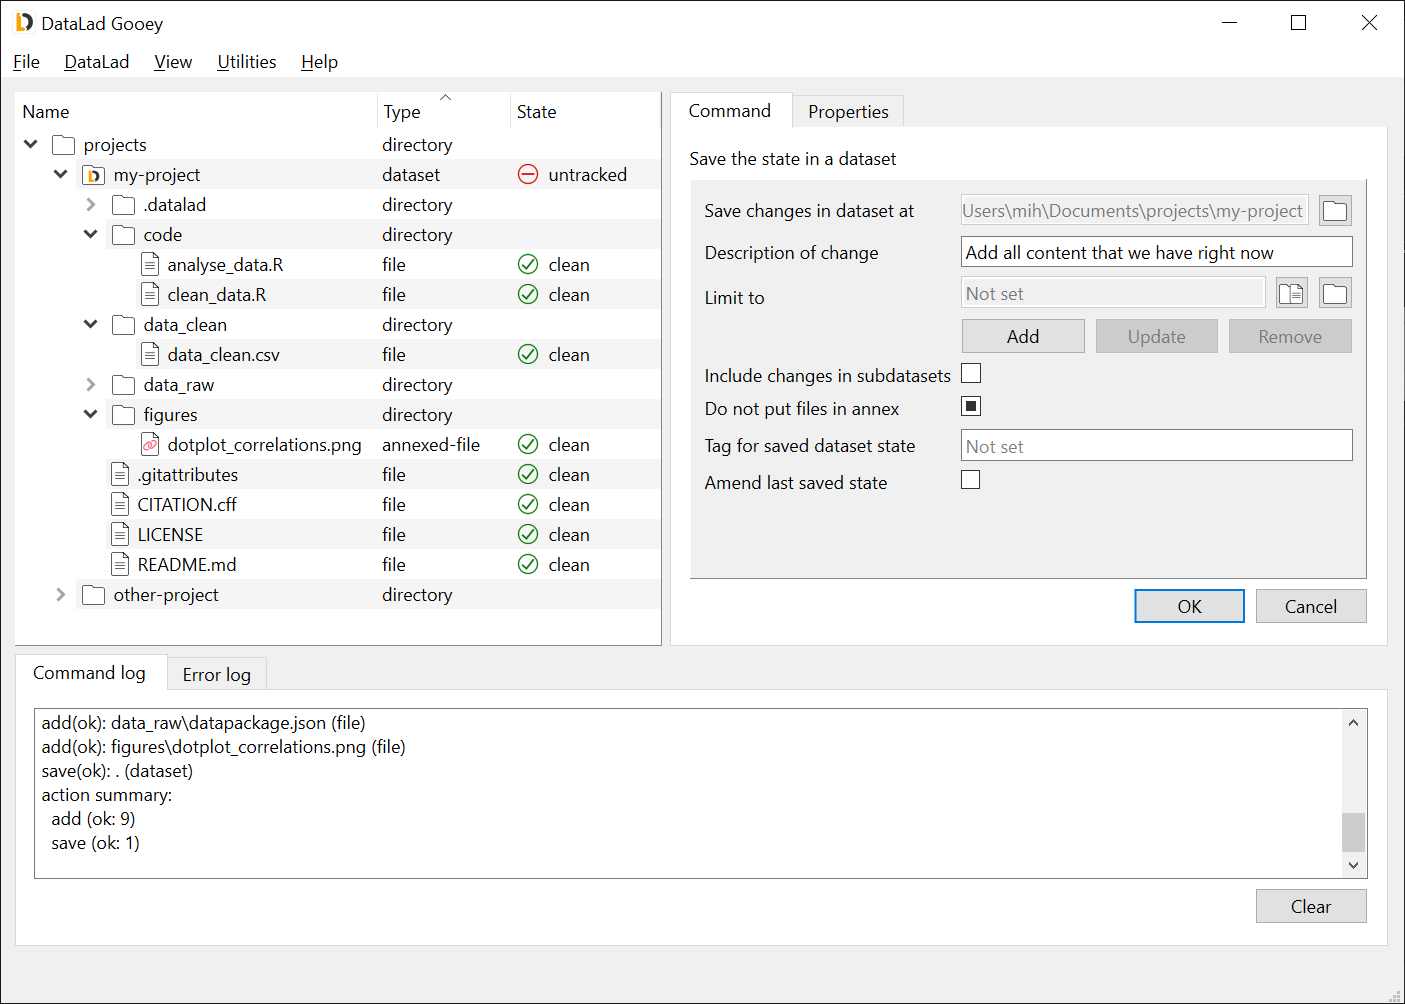
Right-click the newly created dataset, and select Dataset commands → Save the state in a dataset. Parameters required for the Save command should appear in the Command tab. Fill in the Description of change (this is the commit message associated with the save). Leave all other fields default (note: Do not put files in annex is greyed out, not checked, i.e. it has no value). Here, we are saving all files at once, but if we wanted we could limit the save operation to selected files, or trigger it by clicking on a specific file. Once ready, click OK.
Note that after this operation, "untracked" files changed their state to "clean". Different from files, the dataset state is still "untracked", because it is not registered in any superdataset. Because we used the text2git configuration, only the PNG file changed its type to "annexed-file" in the screenshot below.
Create a GIN sibling
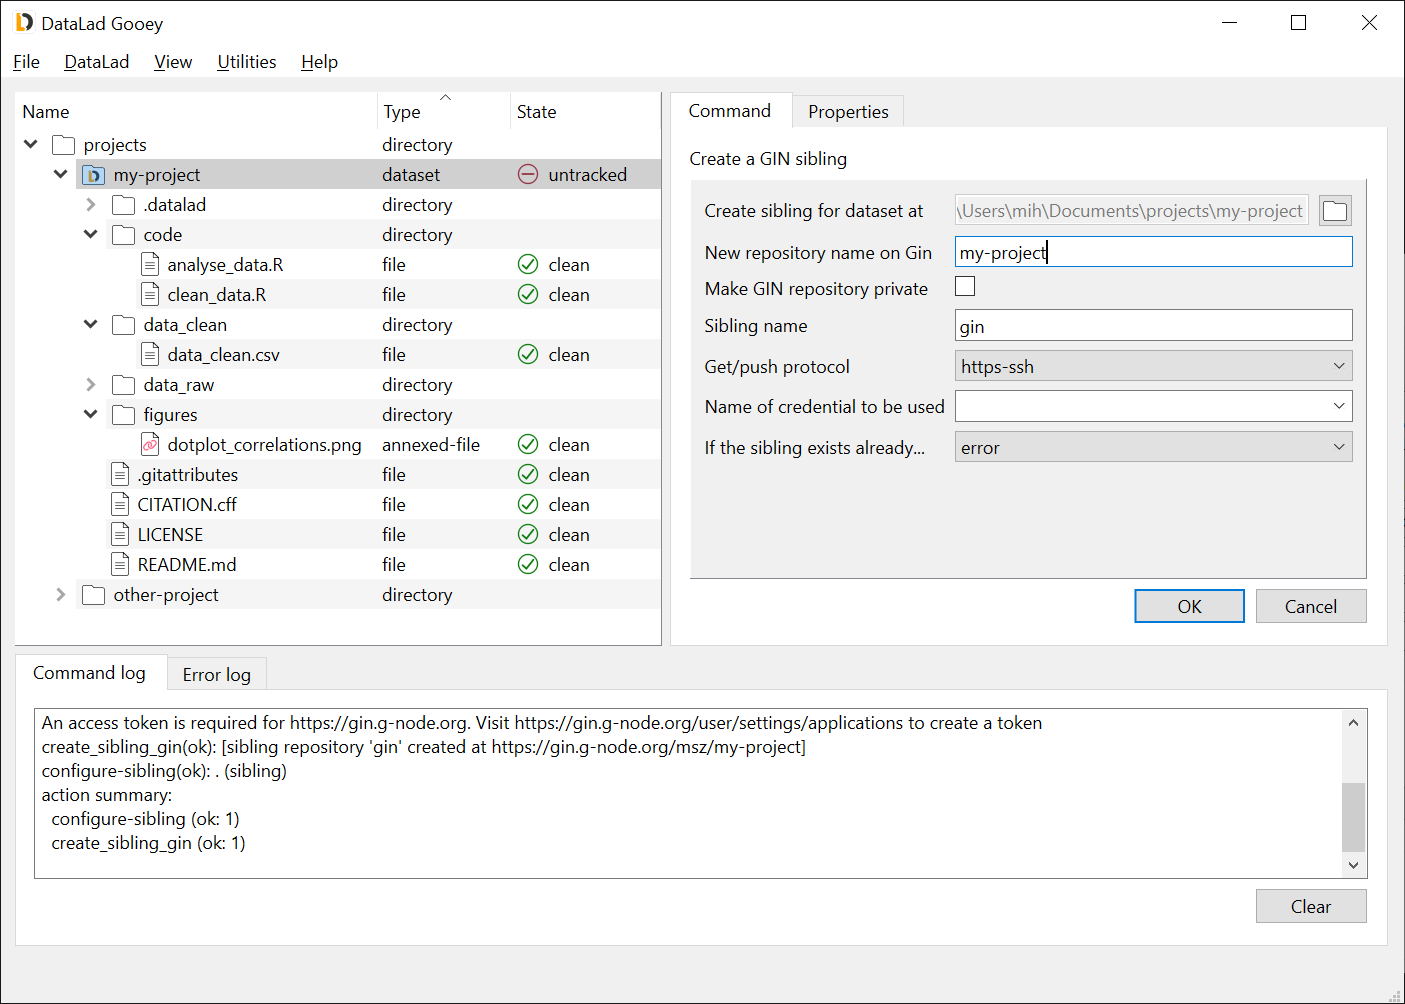
Creating a GIN sibling will create a new repository on GIN, and configure your dataset with its address. To perform this action, right-click your dataset, and select Dataset commands → Create a GIN sibling. Fill in the New repository name on Gin (and, optionally, check the Make GIN repository private). You can leave all other options default.
In the Name of the credential to be used field, you can pick previously used credentials. If no value is given, and no previous credentials exist, the credentials will be save with website name (gin.g-node.org) by default.
Click OK.
At this point, a pop-up window will appear and you will be asked for a token. Paste the access token generated from GIN website, and click OK.
Push to the GIN sibling
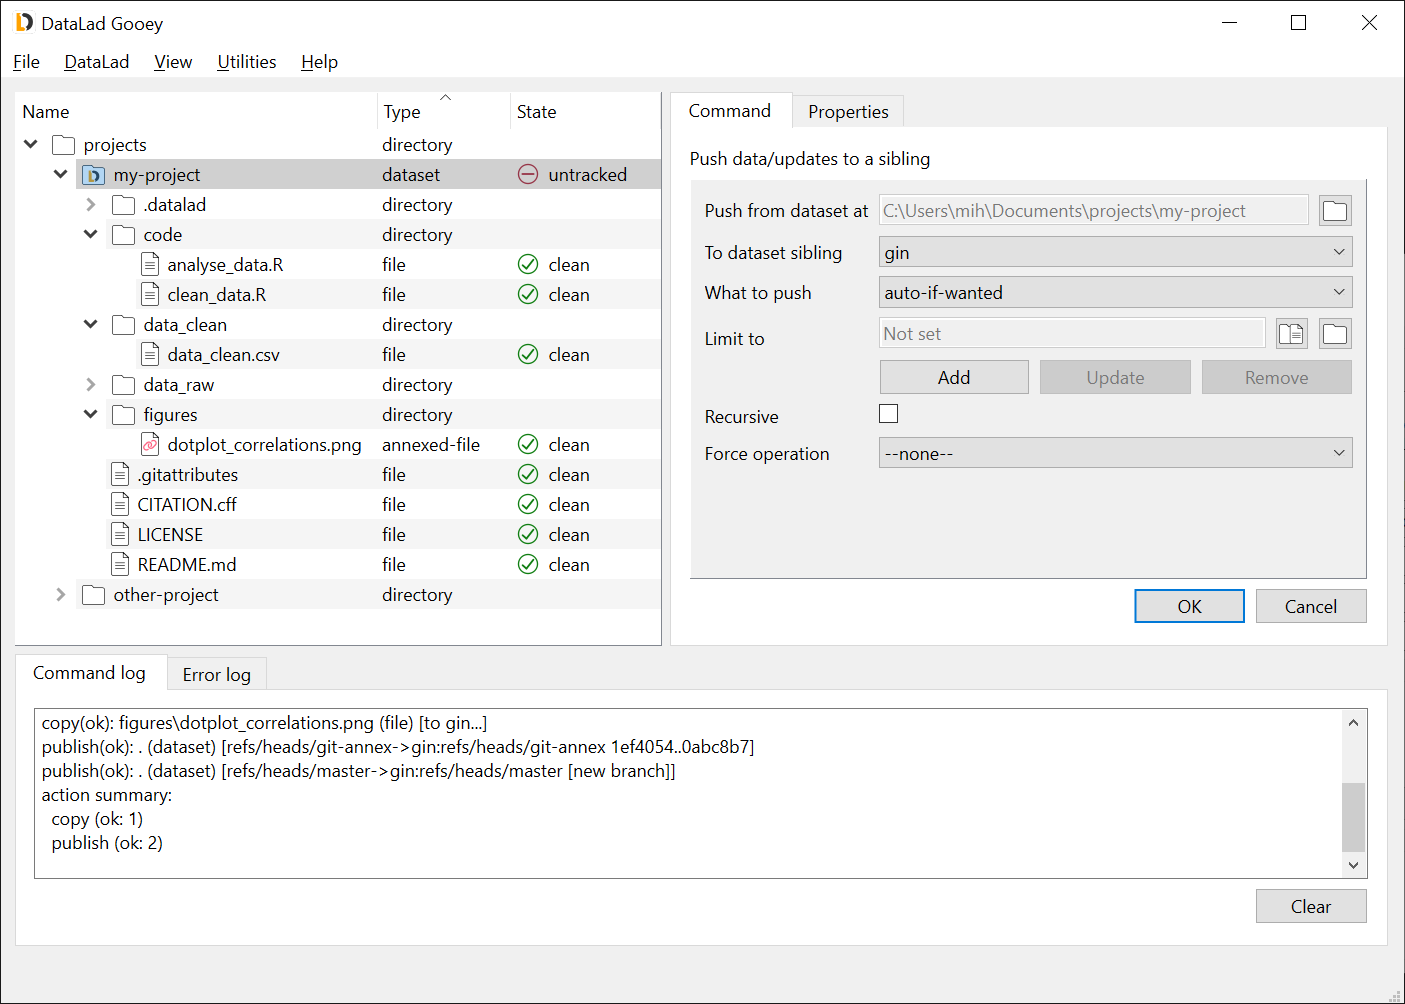
Right-click Dataset commands → Push data/updates to a sibling. The only thing you need to select is the value of To dataset sibling - this will be the sibling name from the step above. Leave other options default, and click OK.
Retrieve the data from GIN
Finally we can confirm that our dataset can be obtained from GIN (possibly by other users who have access).
Let's try making a clone in the same parent directory as our dataset, but under a different name.
To do this, from the menu select DataLad → Clone a dataset.
In the Clone from field, enter the dataset URL taken from GIN.
Here, you can use either the HTTPS (for public repositories) or SSH (for private repositories) URL.
Note that when using HTTPS, you need to remove the .git from the URL ending for proper interaction with GIN.
Next, click the directory selection icon to the right of Clone into field, and use the directory picker
to create and select a new directory named, for example, cloned-dataset.
Afterwards, click OK.
To obtain the annexed contents in the cloned dataset, right click it in the file tree, select Dataset commands → Get content, and click OK. With other options kept default, this will download all annexed content in the dataset; if you wanted to obtain contents selectively, you could use the Limit to option. Alternatively, you could right-click individual files, and use File commands → Get content.